The best PGP tutorial for Mac OS X, ever
When I decided to set up my Mac with PGP encrypted communications, I could not believe how hard it was – not just to set up the software, but to understand how to use PGP properly. There was no “PGP for Dummies” tutorial for OS X on the internet. So I decided to write one. This is my über simple, nerd-free tutorial for anyone on Mac. In it, I will:
- Cover exactly how to install and configure PGP on OS X
- Demonstrate how to use PGP in real life
Why this tutorial is the best (ever)
- It works with every app. Unlike other tutorials for PGP, this tutorial does not care what program you use. If you install or uninstall apps, PGP will keep working. If you want to encrypt email, you can use any email program – Mail.app, Thunderbird, Sparrow, Gmail, Airmail. Or, you can encrypt something besides email, you can do that too. You can write an encrypted letter in Word. You can encrypt a formula in Excel. You can encrypt a URL in Safari. You can encrypt a text with Messages. You can encrypt a bash command in Terminal. It does not matter.
- It is Mac friendly. There is a certain way of doing things on a Mac. If you’re not a Mac fan, you won’t understand. (That’s okay.) Many of the tutorials I found for OS X are not Mac friendly. Many want you to install bloated, Windows-like software; or, install questionable add-ons. I’ve done the opposite. This PGP tutorial is super Mac friendly. It’s PGP, installed the way Steve Jobs would have done it.
- Simple. Above all, this PGP setup is simple. Once you understand how it works, there is nothing you cannot do.
I looked into dozens of ways to set up PGP on my Mac. A lot of them suck for a plurality of reasons. Across the board, this is the best way for 95% of use cases.
Step 1: Install the GPGTools GPG Suite for OS X
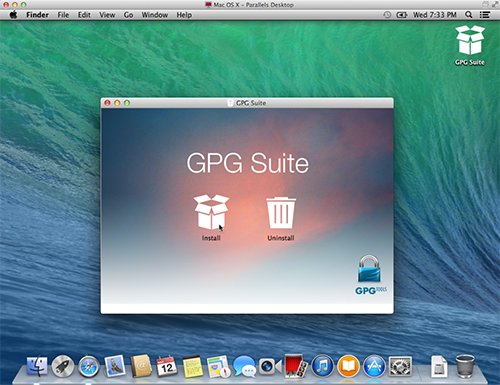
This step is simple. Visit the GPGTools website and download the GPG Suite for OS X. Once downloaded, mount the DMG and run the “Install”.
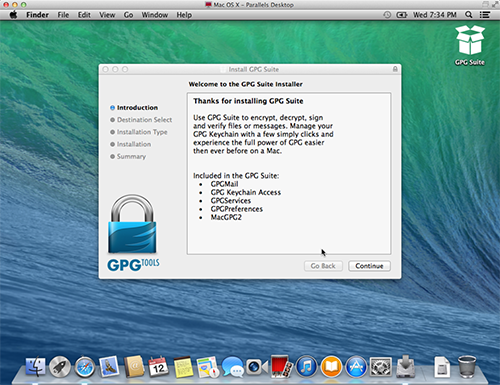
Inside the installer, you can stick with all default parameters save one exception. On the “Installation Type” screen, press “Customize”…
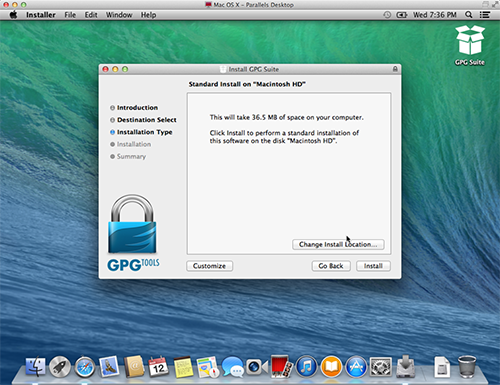
And uncheck the GPGMail package:

Then press “Install.”
Step 2: Creating your very own PGP key
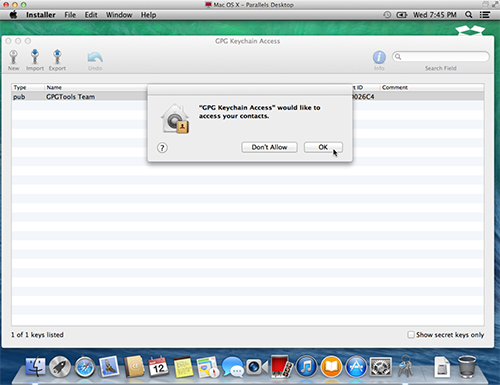
When the installer completes, a new app called “GPG Keychain Access” will launch. A small window will pop up immediately and say: “GPG Keychain Access would like to access your contacts.” Press “OK.”
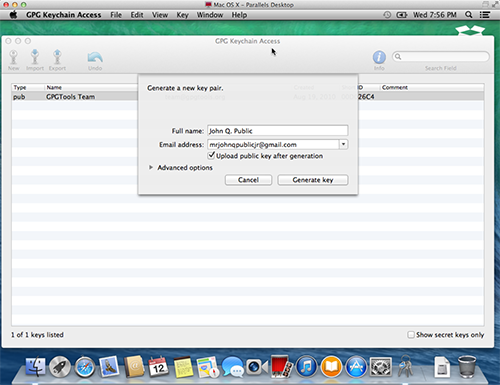
As soon as you press “OK,” a second window will pop up that says “Generate a new key pair.” Type in your name and your email address. Also, check the box that says “Upload public key after generation.” Your window should look like this:
Expand the “Advanced options” section. Incrase the key length to 4096 for extra NSA-proof’edness. Reduce the “Expiration date” to 1 year from today. Your window should look like this:
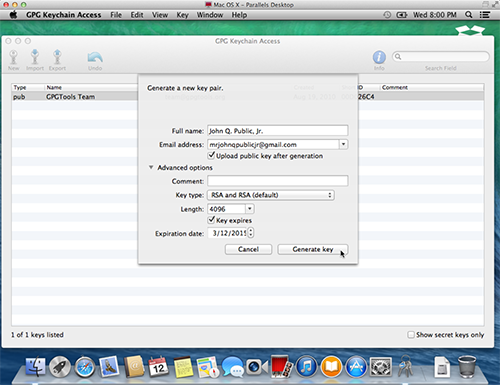
Press “Generate key.”
As soon as you press “Generate key,” the “Enter passphrase” window will pop up. Okay, now this is important…
A brief word about your passphrase
The entire PGP encryption will rest on your passphrase. So, first and foremost… don’t use a passphrase that other people know! Pick something only you will know, and others can’t guess. And once you have a passphrase selected, don’t give it to other people.
Second, do not use a password, but rather a passphrase – a sentence. For example, “Pennstate55” is less preferable than “I graduated from Penn State in 1955, ya heard?!” The longer your passphrase, the more secure your key.
Lastly, make sure your passphrase is something you can remember. Since it is long, there is a tendancy you might forget it. Don’t. The consequences to that will be dire. Make sure you can remember your passphrase.
Back to Step 2…
Once you decide on your passphrase, type it in the “Enter passphrase” window. Turn on the “Show typing” option, so you can be 100% sure that you’ve typed in your passphrase without any spelling errors. When everything looks good, press “OK:”

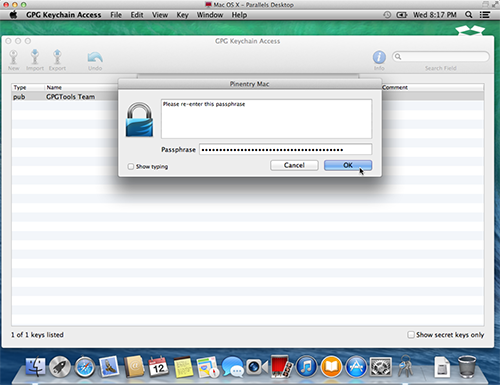
Will be asked to reenter the passphrase. Do it, and press “OK:”
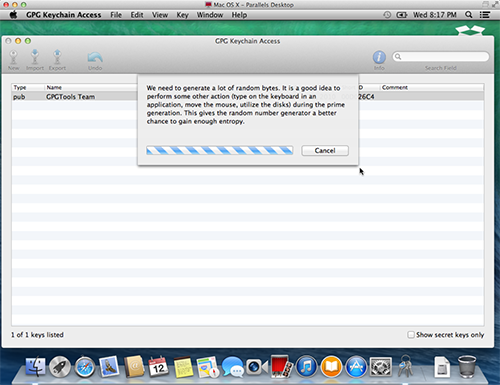
You will then see a message saying, “We need to generate a lot of random bytes…” Wait for it to complete:
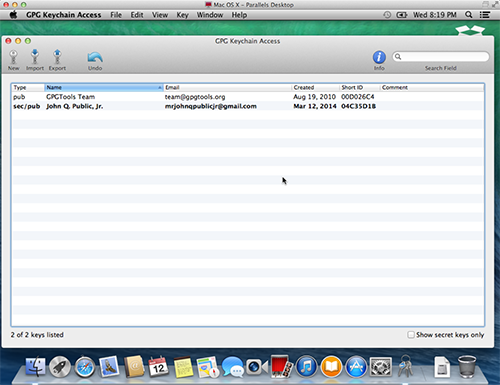
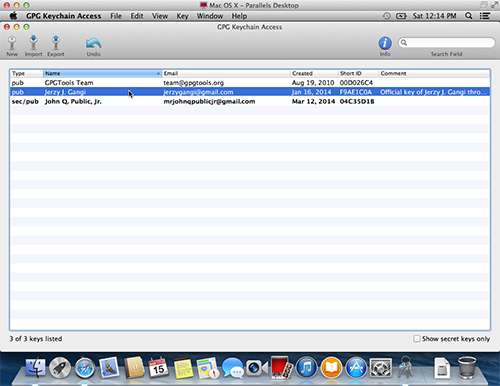
Et voilà! Your PGP key is ready to use:
Step 3: Set PGP keyboard shortcuts
Next, you will set up four global keyboard shortcuts in OS X.
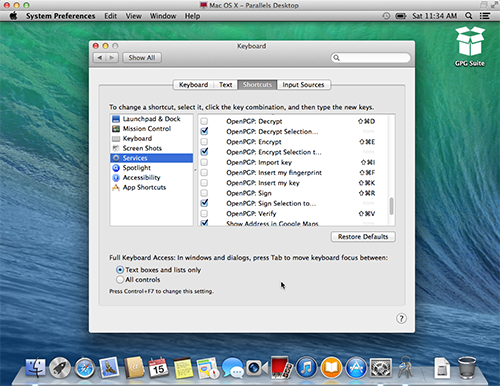
Open System Preferences, select the “Keyboard” pane, and go to the “Shortucts” tab. On the left hand side, select “Services.” Then, on the right, scroll down to the subsection “Text” and look for a bunch of entries that start with “OpenPGP:”
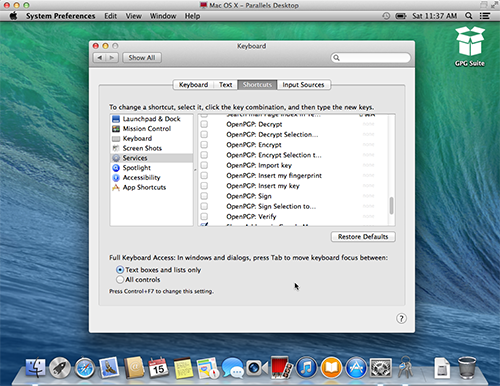
Go through each OpenPGP entry, unchecking each one and deleting the keyboard shortcut:
Next, you will enable and set four shortcuts:
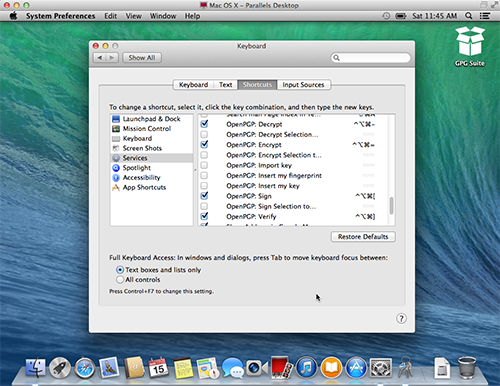
- Enable “OpenPGP: Decrypt” and set its shortcut to ⌃⌥⌘- (i.e., control option command minus)
- Enable “OpenPGP: Encrypt” and set its shortcut to ⌃⌥⌘= (i.e., control option command equals)
- Enable “OpenPGP: Sign” and set its shortcut to ⌃⌥⌘[ (i.e., control option command open bracket)
- Enable “OpenPGP: Verify” and set its shortcut to ⌃⌥⌘] (i.e., control option command close bracket)
Your keyboard shortcuts should now look like this:
That’s it! You’re done setting up PGP with OpenGPG on OS X! Now, we will discuss how to use what we set up.
Step 4: How to send a secure email
You can encrypt anything with PGP, but most people will want to encrypt email. So, I will now take a few minutes to explain that. These steps can be transposed for any kind of encryption, from any app on your computer.
To secure an email in PGP, you will sign and encrypt the body of the message. You can just sign or just encrypt, but combining both operations will result in optimum security. Conversely, when you receive a PGP-secured email, you will decrypt and verify it. This is the “opposite” of signing and encrypting.
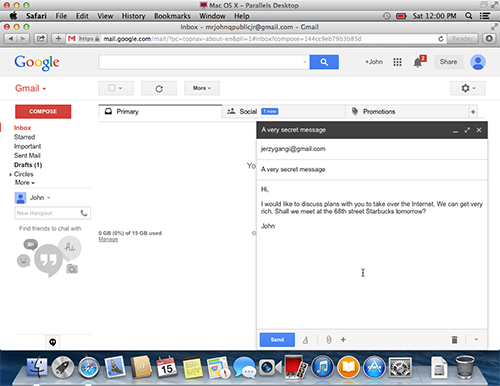
Start off by writing your email:
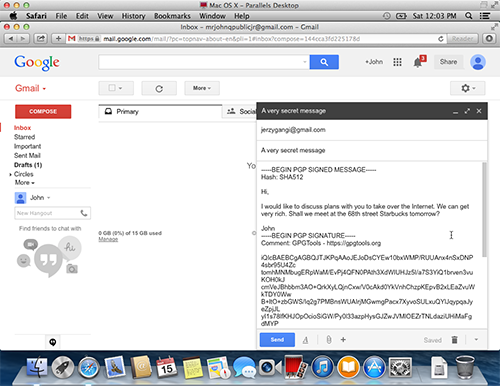
Then, select the entire body of the email and press ⌃⌥⌘[ to sign it:
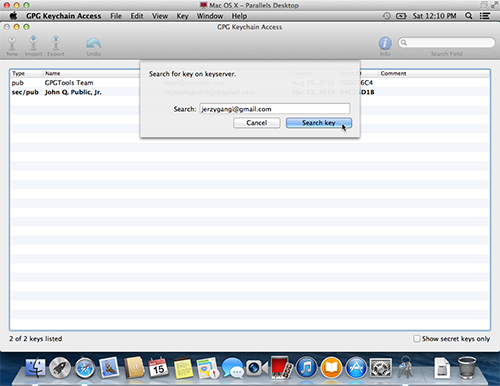
Next, open the GPG Keychain Access app. Press Command-F and type in the email address of the person you are sending your message to. This will search the public keyserver for your friend’s PGP key:
If your friend has more than one key, select his most recent one:

You will receive a confirmation that your friend’s key was successfully downloaded. You can press “Close:”
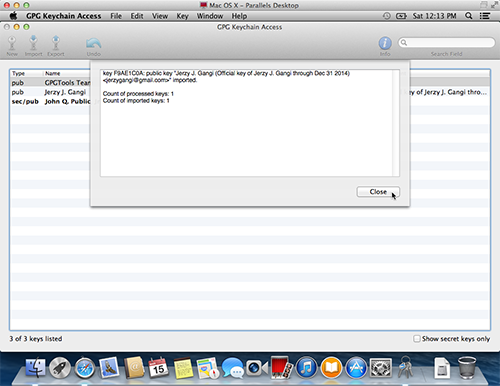
You will now see your friend’s public key in your keychain:
You can now quit GPG Keychain Access and return to writing the email.
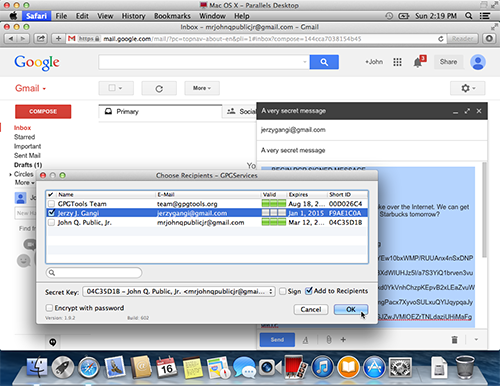
Select the entire body of the email (everything, not just the part you wrote) and press ⌃⌥⌘= to encrypt it. A window will pop up, asking you who the recipient is. Select the friend’s public key you just downloaded, and press “OK:”
Your entire message is now encrypted! You can press “Send” safely.
N.B. You will only need to download your friend’s public key once. After that, it will always be available in your keychain until the key expires.
Step 4: How to receive a secure email
With our secure message sent, the recipient will now want to unscramble it. For the sake of this step, I will pretend I am the recipient.
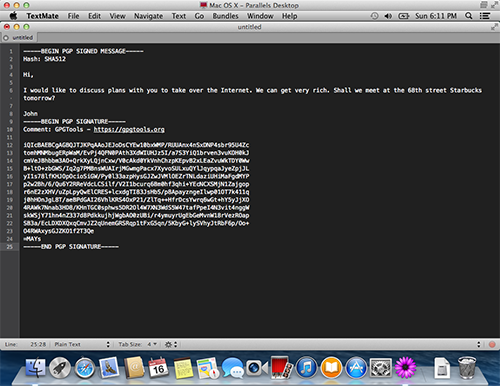
I have recieved the message:
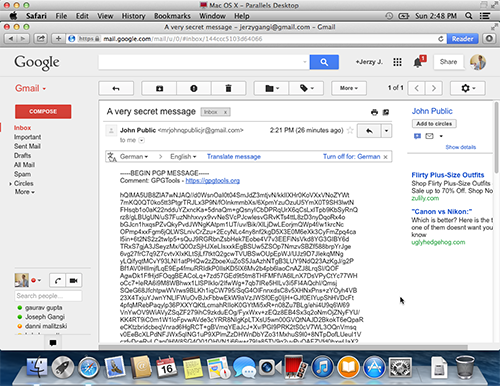
Copy the entire body, from, and including, “—–BEGIN PGP MESSAGE—”, to, and including, “—–END PGP MESSAGE—”. Open your favorite text editor, and paste it:
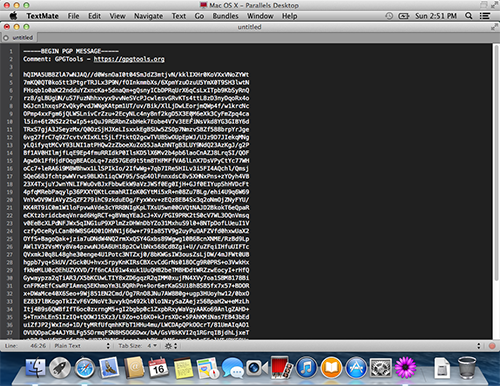
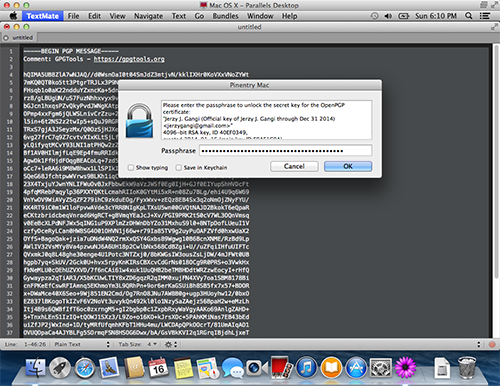
Now select the entire text, and press ⌃⌥⌘- to decrypt the message. You will immediately be prompted for your PGP passphrase. Type it in and press “OK:”

You will now see the decrypted message!
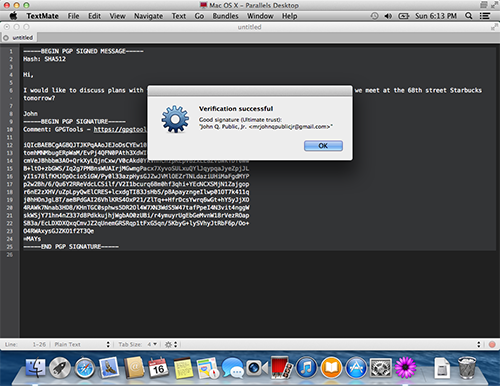
Next, you can verify the signature. Highlight the entire text, and press ⌃⌥⌘]. You will see a message confirming the verification:
You can press “OK.”
What does encrypt, decrypt, sign, and verify mean?
Now that you know how to sign and encrypt outgoing messages, and decrypt and verify incoming ones, let us discuss what these terms mean.
Encrypt takes your secret key and the recipient’s public key, and scrambles a message. The scrambled text is secure from prying eyes. The sender always encrypts.
Decrypt takes an encrypted message, combined with the your secret key and the sender’s public key, and descrambles it. The recipient always decrypts.
Encrypt and decrypt can be thought of as opposites.
Signing a message lets the recipient know that you (the person with your email address and public key) acutally authored the message. Signing also provides additional cryptographic integrity: it ensures that no one has tampered with the encryption. The sender always signs a message.
Verifying a message is the process of analyzing a signed message, to determine if the signing is true.
Signing and verifying can be thought of as opposites.
When should I sign? When should I encrypt?
It is unnecessary to sign and encrypt every outgoing email. Well, then: when should you sign? And when should you encrypt? And when should you do nothing?
You have three rational choices when you are sending a message:
- Do nothing. If the contents of the email are public (non-confidential), and the recipient does not care whether you or an impostor sent the message, then do nothing. You can send the message as you’ve sent messages your whole life: in plain text.
- Sign, but don’t encrypt. If the contents of the email are public (non-confidential), but the recipient wants assurance that you – not an impostor – actually sent the message, then you should sign but not encrypt. Simply follow the tutorial above, skipping over the encryption and decryption steps.
- Sign and encrypt. If the contents of the email are confidential, sign and encrypt. It does not matter whether the recipient wants assurance that you sent the message – always sign when you encrpt.
I do nothing for 90% of emails I send; security is just not necessary. The remaining 10% of the time, I sign and encrypt. Whenever there is confidential information – business plans, credit card numbers, bank numbers, social security numbers, corporate strategies, etc. – I sign and encrypt. I define confidential information loosely, because I’d rather sign and encrypt unnecessarily than do nothing and leak sensitive information. As for the third option, I rarely sign, but do not encrypt. Your profession may warrant radically different usage of PGP.
Why don’t you use PGP MIME attachments? Why don’t you use the Mail.app PGP plugin?
Some PGP nerds prefer sending PGP with attachments (a.k.a., PGP MIME type), instead of using plain text (a.k.a., PGP INLINE).
Conversely, some PGP n00bs want to know why I don’t recommend using a PGP plugin for their email client (i.e., the Mail.app PGP plugin).
Here’s why:
- Attachments are a pain in the ass.
- People who use mail plugins for encryption have no idea how they work; the result is a false sense of security.
- Inline text works places where attachments don’t (the shell, Facebook, iMessage, etc.).
- The majority of people who have sent me
MIMEtest emails using the Mail.app plugins sent undecryptable messages, because they have no idea what they’re doing or how it works. - When a plugin generates an attachment and sends it before you can see what is going on, you have no idea what is happening or if it is working.
- Lots of applications and email clients do not have PGP built in, so you need inline anyway.
Try it out! Email me.
My email address is jerzygangi@gmail.com. Try sending me an encrypted, signed email. I’ll reply.
If my tutorial was helpful, please send me a small donation through PayPal!